“Fifty squats a day keeps the doctor away – Seriously.” So says sports therapist Dr. Christopher Stepien in an article for The Active Fitness. Dr. Stepien is onto something. Squats are a foundational fitness movement and yield a huge bounty of benefits. However, squats can seem intimidating to new exercisers. Even intermediate or experienced exercisers may balk at the thought of doing back squats with a barbell on their back. Fortunately, there are lots of different squat variations you can work on to progressively build your squat and to keep your workouts interesting and challenging.
In this article, you’ll learn why squats are so good for you, how to perform a squat, and all about different squat variations that you can incorporate into your new, squat-tastic fitness routine.
Why Every Exerciser Should Be Doing Squats
Squats are one of the best functional fitness movements you can do. Squats are known as a “compound movement,” meaning they utilize multiple muscle groups. In fact, one of the simplest squat variations–the air squat–incorporates:
- Glutes
- Quadriceps
- Hamstrings
- Adductors
- Hip flexors
- Calves
Squats also activate all the major muscles of the core and bring many small stabilizer muscles into the mix. In other words, each squat you perform works a big portion of your muscles all at the same time. This allows you to get in a great workout in less time.
As if that weren’t enough, a squat movement also improves your flexibility, coordination, balance, and overall body awareness. Squats are an amazing cross-training movement that can improve your performance in nearly any sport. Whether you are a runner, soccer player, football player, or simply want to keep up with your kids, squats can strengthen your lower body and help you be more powerful and explosive.
Convinced that you need to start adding different types of squats into your fitness routine? Let’s learn how to perform a squat.
How to Perform a Squat
Whether you are performing an air squat, an overhead barbell squat, or even a pistol (one-legged) squat, the fundamental squat movement is the same. Before you begin adding weight to your squat, make sure you perfect your squat form. Poor squatting technique will not only limit your progress but could also lead to injury!
To perform an air squat:
- Start with your feet hip-width apart and your toes pointed slightly outward
- Look straight ahead and try to fixate on a point on the wall at eye level
- Slowly push your butt back, just like you were sitting down on a barstool (Note: focus on pushing your hips back first before bending your knees. It may help to hold your arms out in front of you or overhead)
- Bend your knees, pushing them out so that they track with your toes
- Keep your chest up and your hips back. Beginners often feel tempted to drop their chest and lift their booty in the air.
- Keep your weight evenly distributed across your feet. You don’t want your weight to only be in the balls of your feet or only in your heels.
- Squat until the crease of your hip is below the tops of your knee. This is known in the squatting world as “below parallel.”
- As soon as you hit below parallel, squeeze your glutes and stand up. Focus on pushing your knees out as you rise. This may not seem difficult during an air squat, but training your knees to push out will come in handy when you start adding weight.
You’ve just performed an air squat. Great job! Keep practicing until the movement feels smooth and natural. It’s a good idea to practice in front of a mirror. Don’t hesitate to ask a trainer at your gym to watch you and give you pointers.
Beginner – Air Squat Variations
If you have never performed a squat before or don’t feel entirely comfortable with the movement, then begin with these three air squat variations, which become progressively more difficult. Take your time. Air squats by themselves are a great exercise. There’s no need to move onto weighted squats until you are ready.
1.Air Squats with Chair or Medicine Ball
If you are just learning to perform air squats, you may feel uncomfortable pushing your hips back. You may feel wobbly or unbalanced. To help get used to the feel of the motion, start by squatting to a low chair. Focus on pushing your hips back and keeping your chest up. As soon as your glutes touch the chair, raise back up. Don’t sit all the way in the chair or relax your muscles.
The next progression is to squat to a medicine ball. Again, stand up as soon as you feel the ball underneath you. This exercise will help you learn the proper depth of the squat.
2.Air Squats
Once you feel stable with your chair and medicine ball squat, it’s time to begin performing regular air squats. Follow the steps in the how-to section above. Practice, practice, practice. Make sure your air squat is perfect before you progress any further to ensure you’ve programmed the right technique into your muscle memory.
3.Jumping Air Squats
Want to add an extra cardio element to your squats? Perform a small jump at the top of each squat. As soon as your feet hit the ground, immediately drop into another squat. You’ll quickly feel the burn. Jumping air squats are excellent for exercisers who want to become more explosive or learn to do box jumps.
Intermediate – Weighted Squat Variations
Ready to take your air squats to the next level? Adding in weight will help you tone your lower body and will also bring your upper body muscles into the mix. If you want buns of steel and a super strong core, weighted squats are the way to go. Here are several dumbbell squat variations and kettlebell squat variations.
4.Dumbbell Goblet Squat
Find a moderately weighted dumbbell and hold one dumbbell head cupped in your hands. Tuck the dumbbell into your chest so that your elbows are down and to the sides. Perform a squat. You’ll notice that adding a dumbbell may tip you a little forward. Focus on keeping your chest up and your weight distributed between your heels and the balls of your feet. Gradually increase the weight of the dumbbell.
5.Kettlebell Goblet Squats
Using kettlebells can be a little more awkward than using dumbbells. Either can up the challenge of your squat. For a kettlebell goblet squat, turn the kettlebell upside down so that your hands are cradling the bell and the handle is pointed downward. Make sure to push your knees out as you stand up to help power your lift.
6.Double Dumbbell Squats
Another dumbbell squat variation is to hold a dumbbell on each shoulder and perform a squat. This allows you to squat a higher amount of weight.
7.Double Kettlebell Squats
This kettlebell squat variation is a good way to mix up your fitness routine every once in a while. Hold a kettlebell on each shoulder and perform a squat. You’ll need good balance and flexibility to pull off this move.
8.Resistance Band Squats
Not ready for dumbbell squats or want a weighted squat you can do at home? Resistance band squats can do the trick. Step onto a large resistance band, making sure the band is securely beneath each foot. Bring the band up the front of your body and loop it over your head so that the band rests on your traps. Squat. Increase the strength of the resistance band as you progress.
9.Resistance Machine Squats
If you have balance, coordination, or mobility issues and still want to perform weighted squats, look for the resistance squat machine at your gym. These machines come in a variety of configurations and guide you through the movement, taking away the balance requirement.
Advanced – Barbell Squat Variations and Single-Leg Squat Variations
Are you ready to see if you can perform some of the more difficult squat movements? Go ahead and pick up a barbell. This probably sounds like a broken record by now, but it’s critical that you have your squat technique down before you begin barbell squats. If your form is poor, you won’t be able to reach your full squat potential.
Begin barbell squats with an empty barbell and check your form in the mirror or have a trainer at the gym check your form for you.
10.Barbell Front Squats
Hold the barbell in the front rack position. This means the bar should be resting lightly on the top of your chest, just below your clavicle. Bring your elbows up. Breathe in, filling up your diaphragm, then squat, breathing out as you drive up. You know the drill by now, chest up, eyes forward, and knees pushing out. If the weight is too heavy, let go of the bar and let it fall in front of you.
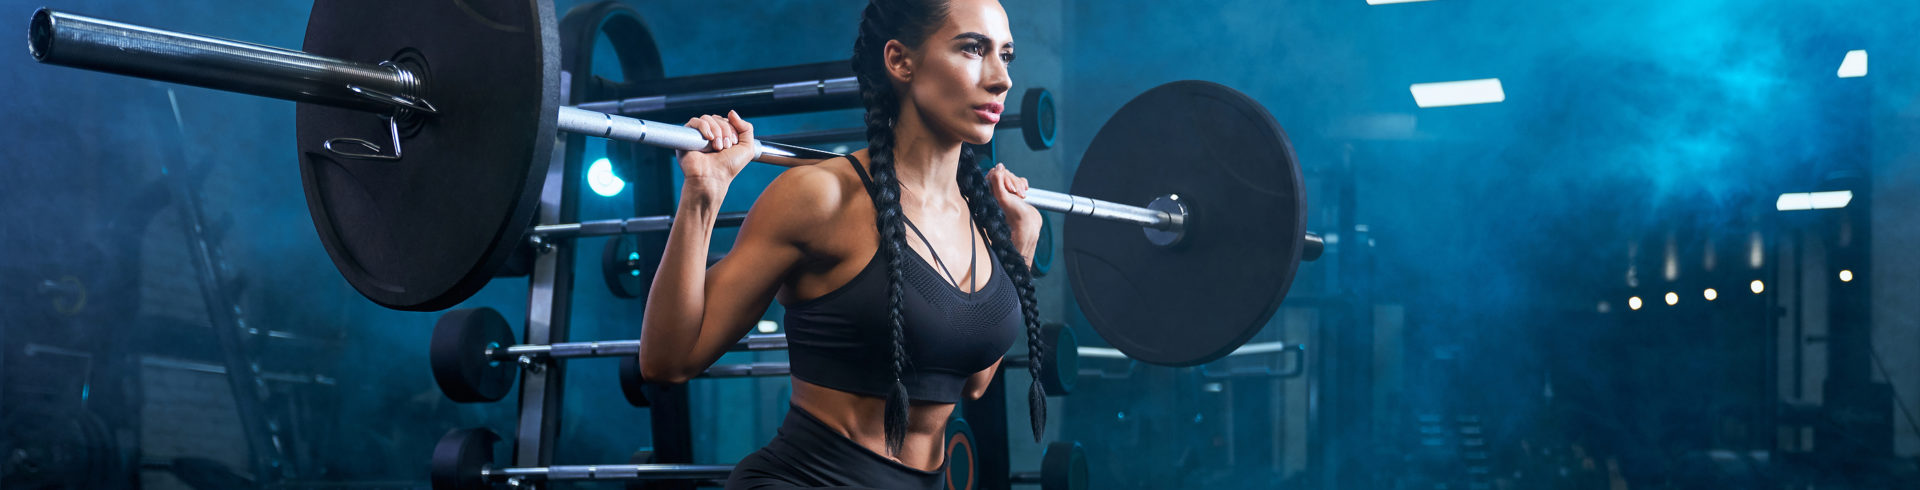
11.Barbell Back Squats
Pull the bar off the rack. Keep your elbows tucked close into your body. Some lifters prefer to keep the barbell high on their back resting right on the traps. This is called the high bar position. Other lifters prefer to hold the bar lower on the back, on the rear deltoids. Lifters could argue all day about which position is better. Generally, the high bar position tends to be more comfortable, while the low bar position may help you lift a little heavier.
For most exercisers, however, the best option is personal preference. As with the front squat, pull in a deep breath, squat, break parallel, then drive your knees out to stand back up. If the weight is too heavy, release the bar and keep your chest up so that the bar will roll off your back and fall behind you.
12.Overhead Barbell Squats
The most challenging barbell squat variation is the overhead barbell squat. It’s a good idea to start with an empty barbell to get comfortable with this movement. Start with the barbell on your back. Move your hands out wide in a “snatch” position. Bend your knees and press the bar overhead. Keep the bar over the center of your body as you squat and stand back up. You’ll need strong shoulders, good shoulder mobility, and excellent balance to perform this movement. If you have shoulder or wrist issues, don’t attempt an overhead squat. Light weight is the name of the game. If the weight is too heavy or you find yourself off balance, push the weight forward and release so that the barbell falls in front of you.
13.Assisted Single Leg Squat
The most advanced squat is the single-legged squat, also known as the “pistol squat.” It takes a lot of patience to learn and it requires a high degree of balance and mobility. If you have any type of knee issues, don’t attempt this type of squat. A great first step to learn the single-leg squat is the assisted single-leg squat. Find a sturdy piece of equipment in the gym or even a table or pillar in your house. Hold onto the pillar with one or both hands for balance and perform the single-legged squat. Lift one leg off the floor and squat with the other leg. Focus on keeping the heel of the lifted leg off the floor and really driving your weight into the foot still on the ground.
As you improve at this technique, switch from both hands to one hand and then try performing a single-leg squat with a hand against the wall.
14.Unassisted Single-Leg Squats
Are you ready to show off your squat skills? Then the crème de la crème is this single-leg squat variation. Perform a squat on a single leg unassisted. Keep the heel of the other leg off the ground as you squat. Maintain control as you lower. Some people find it easier to hold the toe of the lifted foot as they squat to keep their heel off the ground. Others shoot their lifted leg to the side to provide a better counterbalance. However, you can get it done, do it!
Time to Get Squatting
Now that you know all the different squat variations, it’s time to get to work. Begin with the air squat variations and then move to the weighted variations. If you want to increase the challenge and get the most from your squats, start working on the barbell squat variations and, finally, the single-legged squat variations. Take your time and progress at your own pace. Air squats, all by themselves, are a wonderful fitness movement. Do what feels comfortable, and if you aren’t sure about tackling advanced squats on your own, consider hiring a personal trainer to help. Happy squatting!